With the development of science and technology, colorimeter is increasingly used in printing and packaging. As a highly precise and accurate measuring instrument, it can accurately detect the differences between different colors, helping companies to effectively monitor and manage production.
Analysis of the advantages of color detection in printing and packaging
The use of colorimeters for color measurement in printing and packaging offers significant advantages. First, color analysis is one of the fundamental methods used by colorimeter instruments to measure, evaluate, and control product color. Second, a colorimeter can simultaneously measure multiple color samples from the same batch of different varieties. Third, it is more scientific than traditional methods. Fourth, it facilitates automated production management and operation, significantly reducing manual labor and improving work efficiency. In short, colorimeters have broad application prospects in the printing and packaging industry.
Color difference refers to the difference between the color of a product and a standard sample. As the industry continues to evolve, color difference has become a focus of customer attention, a barrier to market competition, and a key branding issue for packaging and printing companies. However, this increasing customer demand for color difference is a double-edged sword for companies.
If the color difference is well controlled, it can be used to beat the competition. If it is not well controlled, it will also be subject to customer complaints, returns, and even be ruthlessly eliminated by the market.
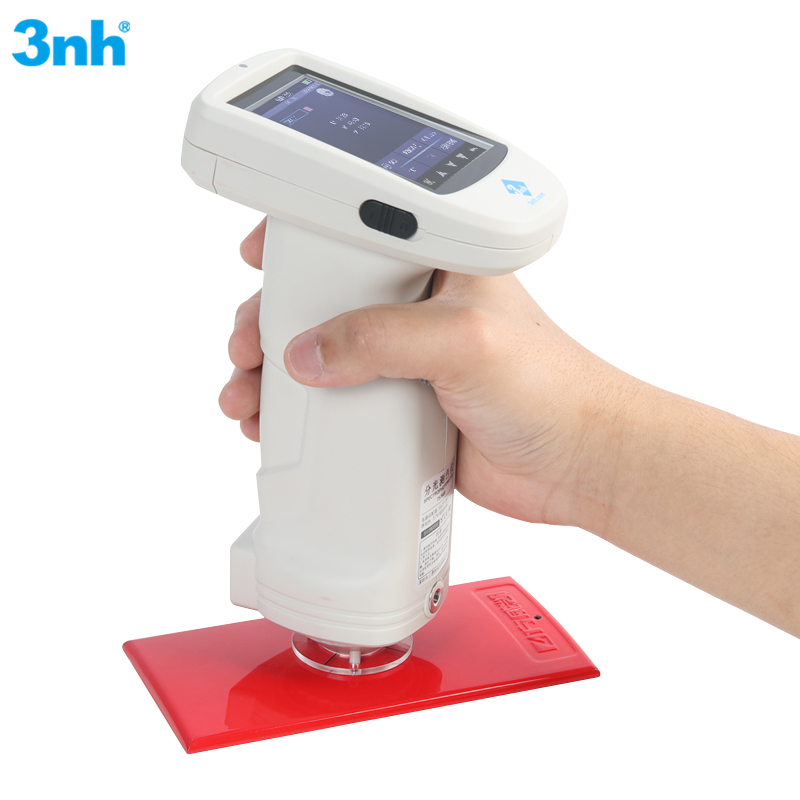
Below we will describe the steps in detail:
Step 1: Prepare the sample to be tested;
Step 2: Turn on the TS7600 spectrophotometer and perform black and white calibration;
Step 3: After the black and white calibration is completed, press the “Print” button, first locate the measurement area with the image, align the standard sample to be measured with the test hole, be careful not to leak light to avoid affecting the test results, then press the “Test” button. After the “beep” sound, the measurement is completed and the test results can be viewed;
Step 4: After completing and saving the standard sample measurement, press the “Menu” key to enter the “Sample Measurement” interface for that standard sample. Align the sample with the test hole according to the standard sample measurement method and press the “Test” key to measure. After a “beep” sound, the color difference measurement is complete and the measurement result is obtained. Compare it with the standard sample result to see if it is qualified.
Based on the measurement results, customers can control color differences during the packaging and printing production process, greatly reducing time and labor costs.
Choosing the correct Print Colour Measurement System
● What do you print on?
● What printing methods are employed?
● Inline (computer-aided) or offline (manual) measurement, do you require?
● Your budget requirement and accuracy?
Key characteristics to contrast
● Geometry: 45/0 for general-purpose, d/8 for irregular or curved surfaces
● Illuminants: D65 for daylight simulation, F2 for offices
● Measurement Range: Complete spectrum (400–700 nm)
● Repeatability: Greater than 0.05 \u0394
● Software Compatibility: Capacity to link to Adobe Suite, RIPs, ERP systems
Choosing a printing color measuring solution that fits your size, business, and workflow saves you money in the long run and gives you better customer retention.